Setting up a MIG welder for the first time can feel a little intimidating. But with the proper steps, you’ll be laying down clean welds in no time. A good setup is key to getting strong, smooth results, and it also helps avoid common beginner mistakes. MIG welding is one of the easiest welding methods to learn, but like any skill, it takes practice and preparation. Thus, setting up your machine correctly means fewer errors, better weld quality, and less time spent fixing mistakes. Continue reading, as this guide will walk you through some vital MIG welder tips for beginners.
Setting Up Your MIG Welding Machine
Getting your MIG welder ready is not that complicated. Once your machine is set up, you’re ready to fine-tune the settings for the material you’ll be welding. A few simple steps can help you weld smoothly and save you a lot of hassle later.
Here’s how to set things up properly.
Place the Welder on a Stable Surface
Start by placing the welder on a flat, stable surface. This keeps it from tipping over and makes sure air can circulate it to prevent overheating.
Install the Wire Spool
Open the welder’s side panel. Then, slide the wire spool onto the spindle, making sure it faces the right direction. The wire should feed smoothly into the drive rollers without twisting. Ensure the spool is locked in place, and gently pull a few inches of wire out.
Thread the Wire
Next, feed the wire through the drive rollers and into the liner. Turn on the welder and slowly press the trigger to help the wire pass through the gun. Then, you should make sure the wire comes out straight and doesn’t kink.
Attach the Ground Clamp
Connect the ground clamp to a clean, bare metal surface on your workpiece or welding table. A solid ground connection is essential for a stable arc. If the surface is dirty or rusty, clean it with a wire brush first.
Connect the Gas Cylinder
Place the gas cylinder securely behind the welder. Attach the gas regulator and tighten it with a wrench. Open the valve slowly and adjust the flow to around 20-25 CFH (cubic feet per hour). This ensures you have the right amount of shielding gas during welding.
Select the Polarity
MIG welding uses DCEP (Direct Current Electrode Positive) for solid wire. Make sure the cables are connected correctly – the positive lead should go to the MIG gun and the negative to the ground clamp.
Load the Contact Tip and Nozzle
Match the contact tip to your wire size (like .030 or .035). Screw the tip onto the gun, then attach the nozzle. Make sure everything stays closely fitted.
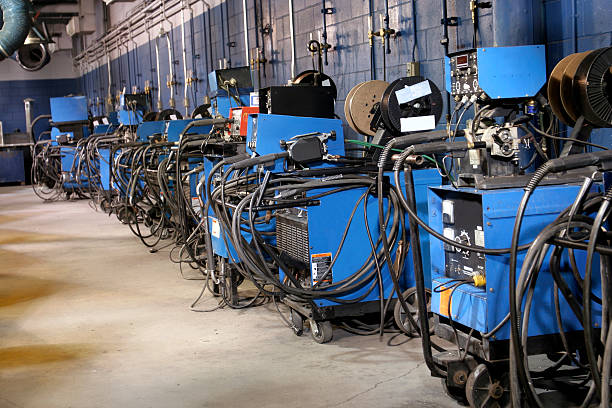
Preparing the Equipment: Power Supply and Gas Connection

welding equipment of MIG and TIG for automatic welding machine
Before you strike your first arc, make sure your MIG welder has the right power and gas setup. A steady power source and proper gas flow are crucial for smooth, clean welds.
Here’s how to get it done:
Check Your Power Supply
MIG welders run on either 110V or 220V power. Check the label on your welder to see which one it needs. Plug it into the correct outlet. If you’re using 220V, make sure the breaker can handle the load. A dedicated circuit is best to avoid tripping breakers during a weld.
Set Up the Gas Cylinder
Place the shielding gas cylinder upright and secure it to a cart or wall with a chain. This keeps it from tipping over. Use the right gas for your project, typically 100% CO2 for deep penetration or a 75% argon / 25% CO2 mix for cleaner, less spatter welds.
Attach the Regulator and Hose
Connect the gas regulator to the cylinder. Tighten it with a wrench, but don’t overdo it. Attach the gas hose from the welder to the regulator’s outlet. Above all, double-check for leaks by slowly opening the valve and listening for hissing. If you hear anything, tighten the connections or replace the hose.
Adjust the Gas Flow
Turn on the gas cylinder and set the flow rate. Around 20-25 CFH is a good starting point. If you’re welding outside or in a drafty spot, bump it up slightly to prevent air from messing with the weld.
Purge the Gas Line
Before you start welding, squeeze the trigger for a few seconds to let gas flow through the line. This clears out any air and ensures the shielding gas protects the weld right away.
Adjusting Wire Feed Speed and Voltage Settings
Getting the right wire feed speed and voltage is key to laying down solid, clean welds. If either is off, you’ll get weak welds, too much spatter, or burn-through. Let’s break down how to set both properly.
Wire Feed Speed
Wire feed speed controls how fast the wire comes out of the gun. If the speed is too slow, the wire will melt before it reaches the weld. On the flip side, if it’s too fast, the wire will push into the weld pool, causing a mess.
Thus, to get it right, do the following:
- Start with the chart – Most welders have a chart inside the machine or manual. It shows recommended wire speeds based on the thickness of the metal and the wire size. Use this as your starting point.
- Test and adjust – After setting the recommended speed, do a quick test weld. Listen for a steady “frying bacon” sound. If the arc sputters or skips, increase the wire speed. If it pushes too hard into the weld, slow it down.
- Watch the weld bead – A smooth, even bead means the wire speed is correct. If the bead is thin or inconsistent, make minor adjustments until it flows nicely.
Voltage Settings
Voltage controls the heat of the arc. The thicker the metal, the more voltage you’ll need to penetrate it. If the voltage is too low, the weld won’t stick. Too high, and you’ll burn through the material.
- Match voltage to metal thickness – Like wire speed, your welder’s chart will suggest a voltage setting based on metal thickness. Stick to these recommendations as a baseline.
- Fine-tune during welding – If the arc feels weak or jumps around, increase the voltage slightly. If the metal burns through or the weld puddle gets too wide, lower the voltage.
- Check the bead profile – A good weld bead has a flat or slightly convex shape. If the bead is too tall or narrow, the voltage is too low. If it’s too flat and wide, the voltage is too high.
Choosing the Right Shielding Gas for Your Project
Shielding gas plays a massive role in MIG welding. It protects the weld from contaminants in the air, like oxygen and nitrogen, which can weaken the weld or cause defects. Choosing the right gas depends on what you’re welding and the kind of finish you’re after.
Take a look at the best options below:
100% CO2 (Carbon Dioxide)
- Best for – Thick metals, heavy-duty welding, and deeper penetration.
- Pros – It’s cheap and easy to find. CO2 gives strong welds and works well for thick steel.
- Cons – Expect more spatter and rougher welds. CO2 tends to run hotter, which can burn through thin metal.
75% Argon / 25% CO2 (C25)
- Best for – Clean, smooth welds with less spatter. Ideal for thin to medium steel.
- Pros – This mix strikes a balance between penetration and appearance. It keeps the arc stable and makes cleanup easier. Most beginners start with C25 because it’s forgiving.
- Cons – It’s pricier than straight CO2.
100% Argon
- Best for – Aluminum and non-ferrous metals.
- Pros – Argon creates a smooth, stable arc for clean welds on softer metals.
- Cons—It won’t work well on steel. If you try it, you’ll get weak, incomplete welds.
Helium Mixes (Helium/Argon/CO2)
- Best for – Stainless steel and thicker non-ferrous metals.
- Pros – Helium adds heat to the weld, making it great for deeper penetration. It works well for heavy, thick materials.
- Cons – Helium is expensive and not always necessary unless you’re working with rigid materials.
If you’re just starting, C25 is the safest and most versatile option. It handles most steel jobs well and gives you fewer issues while learning.
Safety Precautions Before Starting the Weld
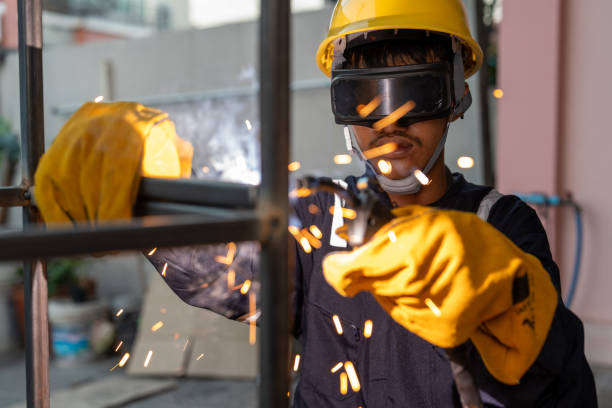
a worker wearing a safety suit while using a welding machine
MIG welding can be dangerous if you skip safety steps. Sparks, heat, and fumes are all part of the process, so protecting yourself is a must. A few simple precautions can save you from burns, eye damage, and even long-term health issues.
Here’s what to do before you start welding.
Gear Up Properly
Welding without the right gear can lead to serious injuries. A welding helmet with an auto-darkening lens protects your eyes from the bright arc that can cause flash burns in seconds. Regular clothes or thin materials can catch fire quickly, so avoid wearing synthetic fabrics. Steel-toe boots are essential, too. Don’t forget your respirator or mask, especially when working indoors. Welding fumes can be dangerous, and inhaling them over time can lead to lung problems. A respirator keeps you breathing clean air, reducing the risk of long-term damage.
Check Your Workspace
Start by clearing any flammable materials like paper, wood, or chemicals from the area. Sparks from welding can travel several feet, so make sure nothing that can catch fire is nearby. Ventilation is just as important. Welding produces fumes and gases that can cause breathing problems if the area is closed off. Working near an open window or using a fan helps, but a fume extractor is the best option for indoor welding.
Inspect Your Equipment
Before switching on your MIG welder, inspect all cables and leads for any signs of wear or damage. Frayed wires or cracked insulation can cause shocks or even fires. Replace any damaged parts immediately. Then, check the shielding gas flow by listening for leaks and ensuring the gas regulator is functioning correctly.
Prepare for Emergencies
A fire extinguisher should always be nearby, preferably a Class C extinguisher that’s designed for electrical fires. A basic first aid kit is equally essential. Having a first aid kit on hand ensures you can treat minor injuries quickly. Lastly, know your exit plan. If something goes wrong, you need to be able to leave the area fast. Make sure pathways are clear and everyone in the shop knows where to go in case of an emergency.
Conclusion
Setting up a MIG welding machine may seem tricky at first, but it becomes much easier once you know the steps. With proper adjustments and good safety habits, you can tackle your projects with ease. Paying attention to details like wire speed, voltage, and shielding gas can make a big difference in how your welds turn out. On top of that, wearing the right gear and keeping your workspace safe protects you from unnecessary accidents. By following these guidelines, you can avoid common mistakes and start welding with confidence.
At Zintilon, we offer the best tools, tips, and support to help you succeed. Whether you’re just starting or refining your skills, we’re here to make your welding projects smoother and safer. Contact us today to make welding metal easier, safer, and more efficient.
